It’s easy to duplicate an Azure Logic App in a resource group, but unfortunately you cannot duplicate a Logic App between environments (you might try to copy paste the JSON though). So unless you want to hand craft every Logic App yourself on each of your environments, you need a way to automatically deploy your Logic Apps. It’s easier, faster and less error-prone than any manual method.
Step 1 is to get your Logic Apps in source control (preferably git). The blog post Logic Apps and Source Control (with PowerShell) explains how you can do this. The code you’re checking into your repo are ARM templates describing the structure of the Logic App.
Step 2 is to create a build pipeline in Azure Devops. It’s not actually building anything, it’s just copying the necessary files to the artifact staging directory and then publishing them so a release pipeline can pick the files up. I created a build pipeline using the classic editor, because a like a GUI better than YAML.

First we need to choose the source repo type, the team project, the repo and which branch you want to use.

In the next screen, choose Empty job.

Give the pipeline a decent name. I chose Azure Pipelines as the agent pool and windows latest as the agent spec.

Click the plus icon to add a task to the agent job. Add a Copy files task.

Configure it like this:

It’s copying files to the $(Build.ArtifactStagingDirectory) staging directory. It’s copying all the JSON files it can find in the root folder (that’s why the source folder is empty). However, it’s skipping all parameter files. I don’t need the parameter files, because:
- I don’t have user-defined parameters in my Logic Apps.
- I made sure my API connections are named the same in all environments. Those API connections are automatically created by Azure Logic Apps when you use a connector. For example, if you send an email with your Outlook account, an API connection will be created to Office365 storing your account credentials.
It also copies a PowerShell script that will do the actual deployment in the release pipeline. If we want to reference this script, pipelines need to be able to find it. I’ll come back to this PowerShell script later in this blog post.
Next we need to add a Publish task to publish (who would’ve guessed) the files from the staging directory.

It’s configured like this:

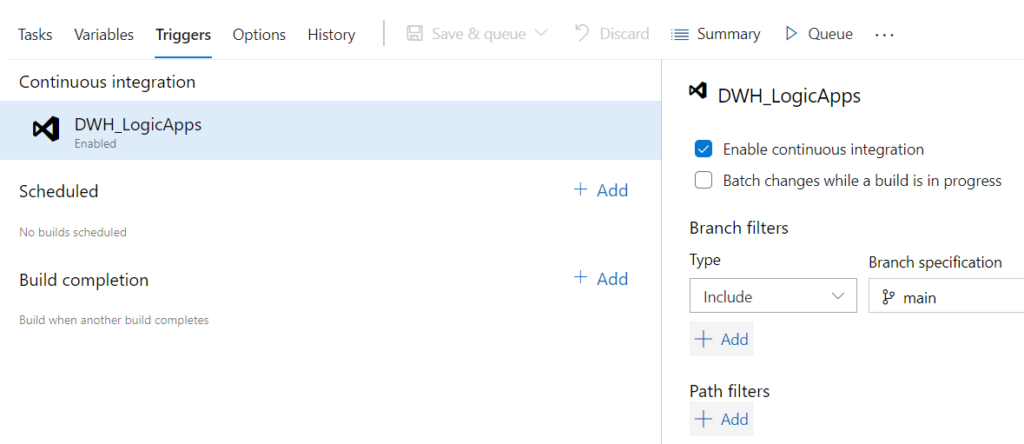
And that’s it for the build pipeline. You can choose to trigger it every time a commit is made to the main branch.

Step 3 is to create a release pipeline. If you search around the web for solutions on how to deploy Azure Logic Apps, you’ll typically find posts explaining how to deploy an ARM template. That’s all fine and dandy, but what if you have 30 Logic Apps instead of just one? Are you going to add 30 ARM deployment tasks to your release pipeline? And add one each time a new Logic App is created? A more scalable method is to deploy using PowerShell. The following script (which is the one copied and published in the build pipeline) will loop over all the JSON files (aka ARM templates) it can find and deploy it to a resource group. Side note: it’s enough to specify a resource group, you don’t need to explicitly specify a subscription.
param(
    #ResourceGroup - the name of the resource group we want to deploy to
    [Parameter(Mandatory=$true)]
    [String]$resourceGroup
)

#the path where all the json files are stored
$RootPath = (Split-Path $PSScriptRoot -Parent) + "\*"
#list all .json files from folder
#we're excluding the parameter files.
$files = Get-ChildItem -Path $RootPath -Include *.json -Exclude *parameters.json

#deploy each json file to the prod tenant
foreach ($f in $files){
    Write-Host $f.FullName
    try{
        az deployment group create `
        --name LogicAppDeployment `
        --template-file $f `
        --resource-group $resourceGroup

        if(!$?){
            Throw "Error occurred while deploying logic app. Please check the logs."
        }
    }
    catch {
        Write-Error "ERROR: $Error"
        $Error.Clear();
    }
}
A couple of remarks:
- I’m excluding the parameter files because as mentioned before I didn’t need them. However, if you do need to set parameters, you can either include the parameter file or you can manually override a parameter in the az deployment group create command.
- I’m not deploying any custom connectors, because I couldn’t get it to work. I extract one from the Azure Portal into an ARM template, but it always kept complaining the structure of the ARM was not OK.
- I’m using Azure CLI. No real reason, you can convert the script to use Azure PowerShell instead if that’s your preference.
- The script is looping over all ARM templates and deploying them inside a TRY … CATCH. Because it’s Azure CLI, you need to check the output to find out if an error occurred or not. This is done using the system variable $?. If there was an error, it will be thrown and handled in the catch. Because an error is written in the catch block, the deployment will stop and fail if a single Logic App fails to deploy.
As a reminder, the expected folder structure is like this:

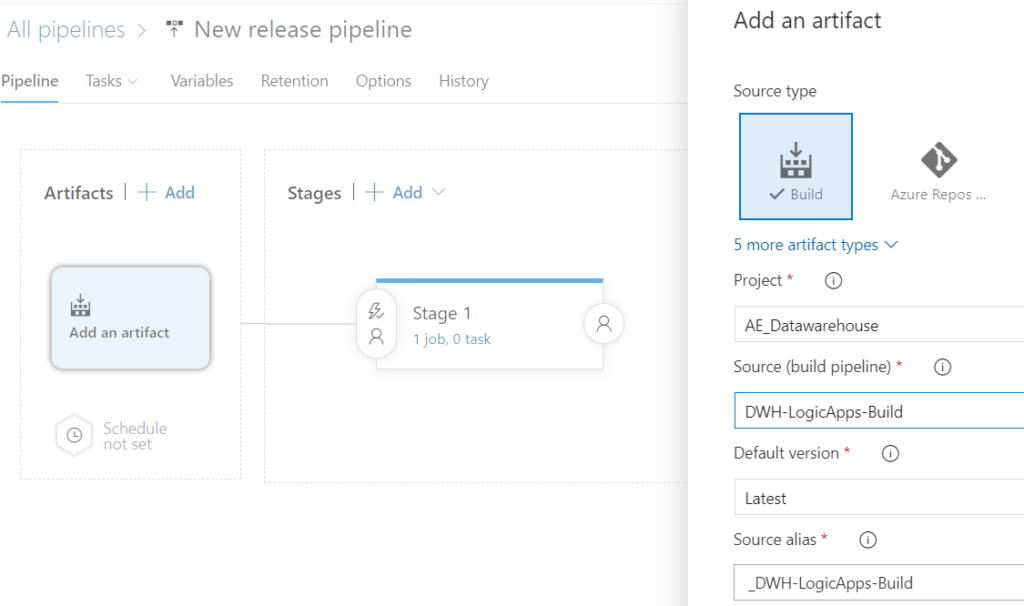
Create a new release pipeline and choose the empty job template. Give your release pipeline a decent name, and choose the output from the build pipeline we just created as source for the artifacts.

Give the stage name (production for example, kind of depends on how many stages you want). Click on the “1job, 0 task” link to add some tasks. For the agent job, I used the same configuration as for the build pipeline. I added an Azure CLI task, but if you’re using Azure PowerShell you’ll need to add a task of that type.

Give the task a name and choose the ARM connection (either choose a subscription and authorize it which will create an app registration for you behind the scenes, or choose an already existing service connection). Choose the script we published in the build pipeline and specify the target resource group as a script argument:

And that’s it. You can save the pipeline and then create a release and start the deployment to push your Logic Apps to another environment. It’s not the fastest deployment; in my environment it takes about 10 minutes to deploy 16 Logic Apps.
------------------------------------------------
Do you like this blog post? You can thank me by buying me a beer 🙂