Finally we’ve come to the core of this blog post series: extracting data from a REST API endpoint. Just to recap, you need the following:
- an access token that is currently valid. See this blog post.
- a list of divisions. See the previous blog post.
As an example, we’re going to read from the Projects endpoint. The pipeline will have the following format:
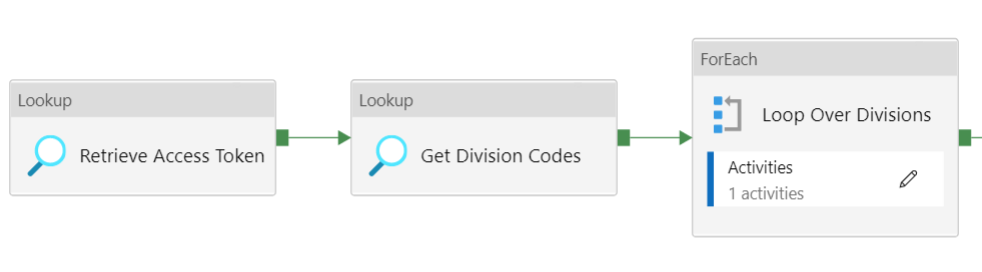
- First we retrieve the current access token.
- Then we retrieve the list of divisions from the database.
- Finally, we loop over this list so we can fetch data for each division from the same REST API endpoint at once.
Inside the ForEach loop, we have a Copy Activity:

The first Lookup Activity is exactly the same as the one in the pipeline fetching the divisions, as explained in the previous blog post. The second Lookup Activity retrieves the set of divisions:
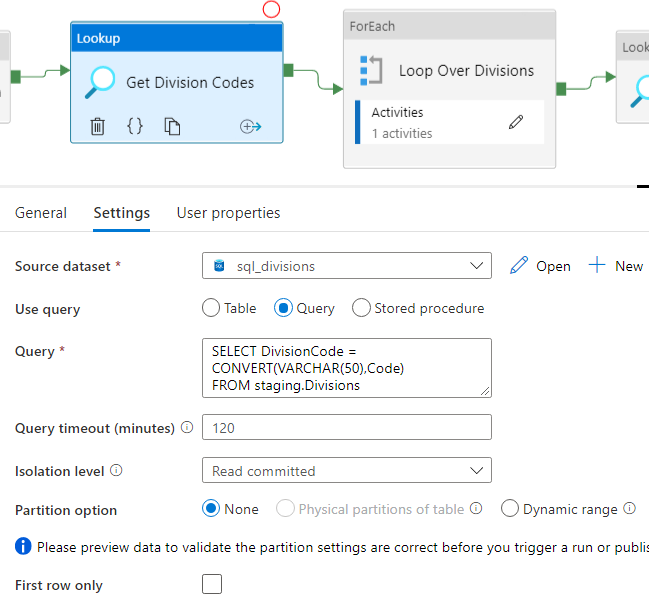
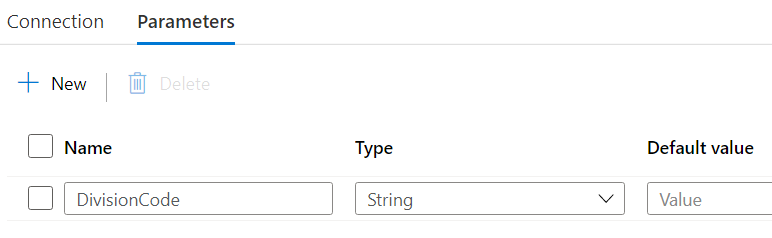
The dataset is also the same one as in the previous blog post. In the query, we convert the DivisionCode – which is an integer – to a string, because that works a little better in the expressions. Make sure the checkbox for First Row Only is not checked. Next, we need to configure the ForEach loop.
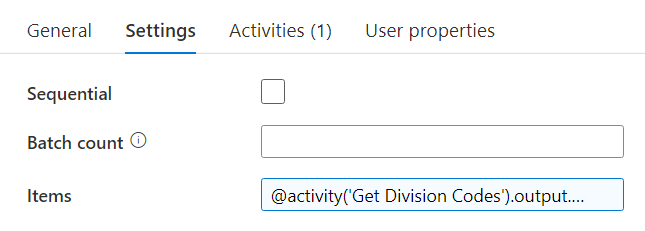
The expression for the Items property: @activity(‘Get Division Codes’).output.value. Inside the ForEach we have a Copy Activity which will read the data from the REST API and dump it into Blob Storage. First we need to define a REST dataset.
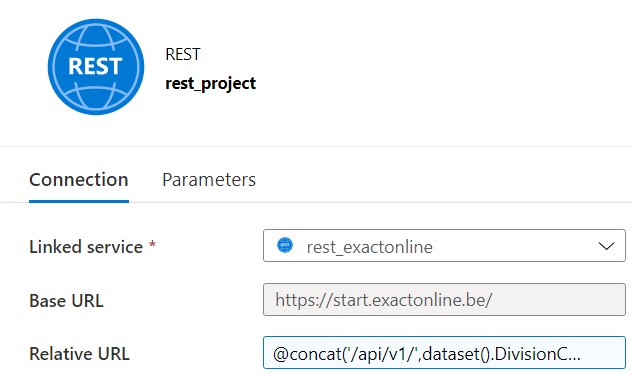
As mentioned in previous blog posts, the Base URL depends on your country. The linked service was created in this blog post. Because we’re going to loop over the divisions, we need a parameter in the Relative URL.
The expression for the Relative URL then becomes:
@concat('/api/v1/',dataset().DivisionCode,'/project/Projects?$select=ID,Account,column1,...,columnN')
With the $select query parameter, you can define which columns you want to select. If you go to the Exact Online REST API doc, you can select which columns you want and it will generate the URL for you:
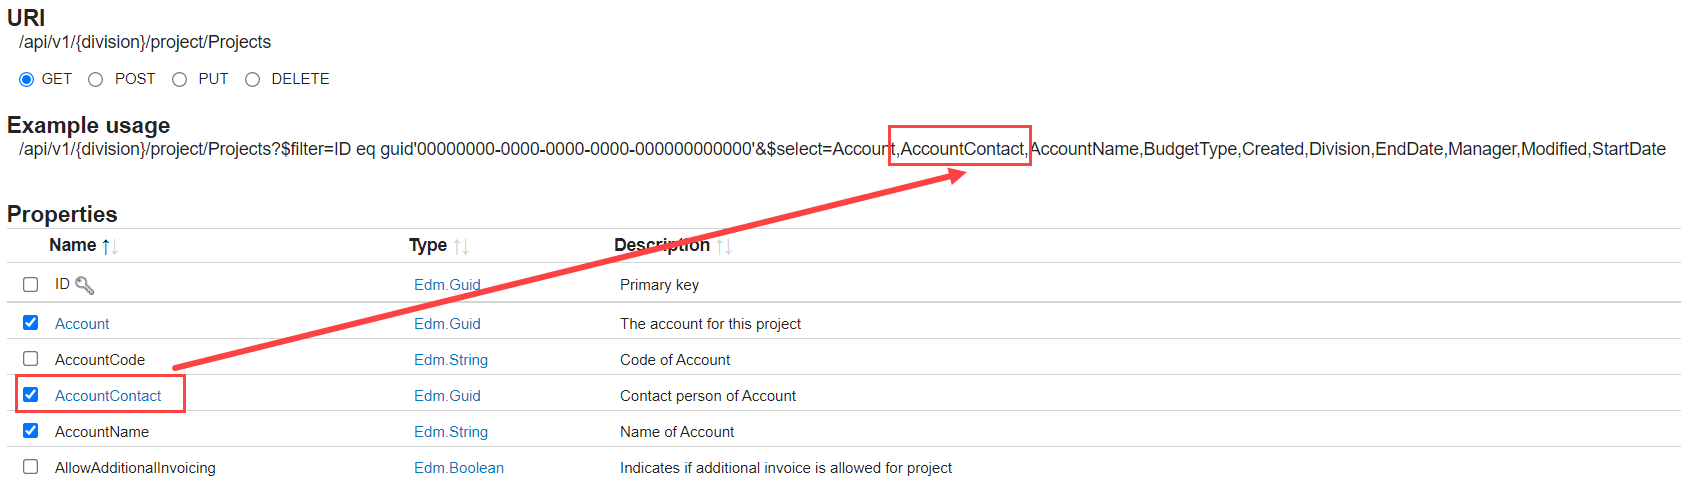
The REST API behaves as an OData source, meaning you can select which columns you need, but you can also filter on certain columns (as shown in the Example usage URL in the screenshot above) or even sort data (not recommended though). You can find more info on the query string options here. The source of the Copy Activity can be configured like this:

Since we specified a parameter in the dataset, a value needs to be provided here. We’re going to pass the division code that is currently being looped over by the Foreach loop. You can do this by accessing the item() set: @{item().DivisionCode}. The expression for the additional Authorization header is the same as in the blog post where fetched the refresh/access token pair:
@concat('Bearer ',activity('Retrieve Access Token').output.FirstRow.AccessToken)
As a sink, you can write the data to a JSON file, since this is the format the REST API uses, but you can also convert directly to CSV. CSV is slightly easier to use and consumes less disk space, but there’s another reason I prefer CSV which I will talk more about when we’re dealing with pagination. I defined a generic CSV dataset that will be used by all pipelines that need to write data to a CSV file.
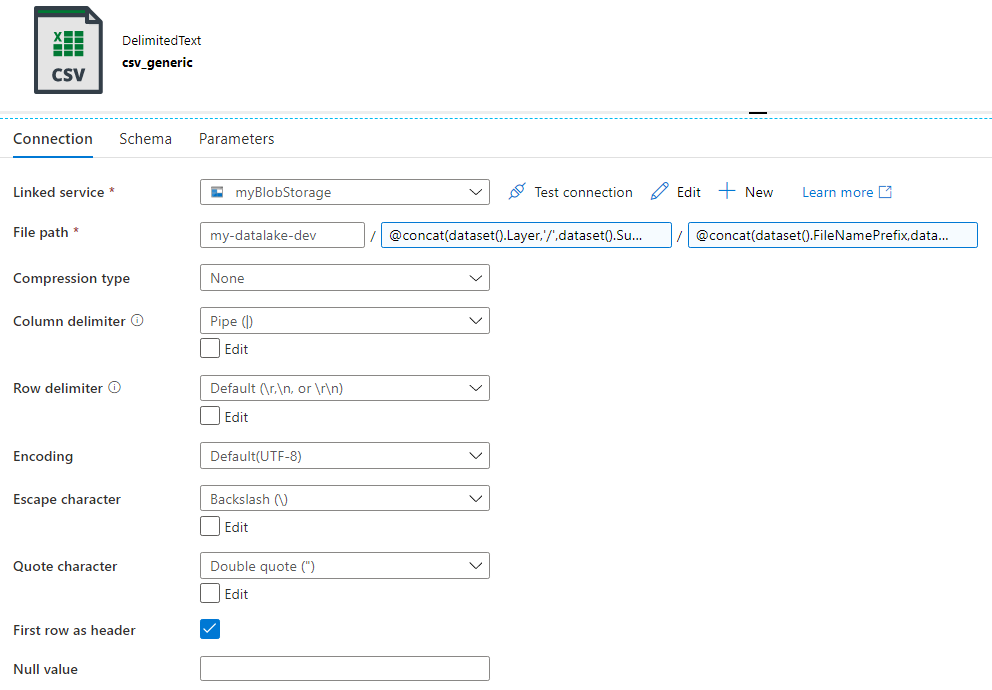
That’s the beauty of ADF. You can define a schema-less dataset once, and then reuse it in a bunch of pipelines where the schema will be derived either on the fly during runtime or in that specific pipeline during design time. This avoids creating 50 different CSV datasets when you want to read from 50 endpoints. Since it’s a generic dataset, I defined a couple of parameters to make it dynamic:

- Layer: the name of the layer in the data lake. Raw, clean …
- Subject: the name of the endpoint we want to extract. In this case, projects.
- FolderName: can be used when you’re incrementally loading data and you want to have for example a year/month/day folder structure.
- DivisionName: the division code in string format.
- FileNamePrefix: if you want to prefix the file name, for example a timestamp. E.g.: hhmmss_filename.csv.
- FileName: the name of the file itself. E.g. project.csv.
You don’t have to use these parameters in your solution, but I found they improved my solution a lot since I had to create far less objects and I could cover multiple uses cases with one single dataset. The folder in the file path of the dataset has the following expression:
@concat(dataset().Layer,'/',dataset().Subject,dataset().DivisionName,dataset().FolderName)
For example, the following folder structure can be configured: blobcontainer/project/xxxxx/2021/05/24/, where xxxxx is the division code. The filename has the following expression:
@concat(dataset().FileNamePrefix,dataset().FileName)
The sink has the following configuration:
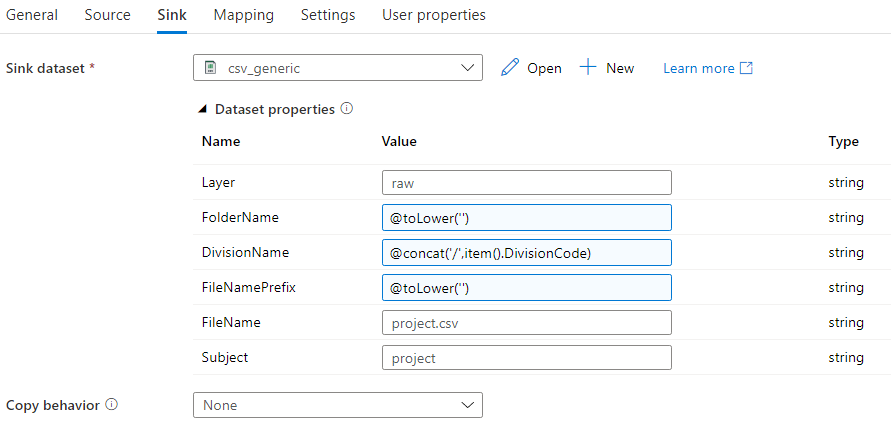
We’re not using all parameters of the generic dataset. However, ADF doesn’t support optional parameters, so we need to specify something. It’s not possible to directly specify a blank string, but a little work around does the trick: @toLower(”). In the mapping pane, you can import the schema of the JSON file. When you try to import the schema, you’ll need to specify a valid access token, like in this blog post. For the collection reference, make sure $[‘d’][‘results’] is specified.

Since we’re writing to a CSV file, I mapped all columns to the String data type. The pipeline is now finished. When we run it, a folder will be created for each division.
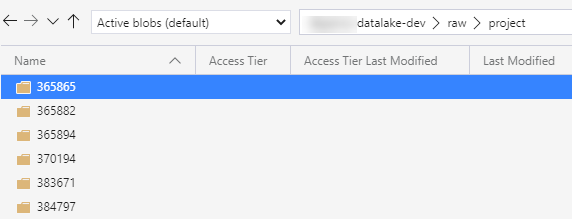
In such a folder, we can find the projects for that specific division:

Related Posts
------------------------------------------------
Do you like this blog post? You can thank me by buying me a beer 🙂
hi Koen,
After running the pipelines ( I guess too many times), first pipeline that requests new access token and refresh token is failing with the error: “error”: “invalid_grant”,
“error_description”: “Token is not allowed, because of invalid or empty chainId”
Do you have a solution for this?
There are many reasons why Exact Online can give an error regarding tokens. Either one expired, or you requested is too soon, or you went over the rate limit et cetera.